hugo 를 0.104 버전에서 0.125 로 업그레이드 한 내용을 정리해보려 한다. hugo 기능중에 Multilingual mode 를 사용하고 싶었고, 중요한 hugo.toml 파일을 계속 수정해야만 했다. 그래서 별도로 프로젝트 폴더를 분리해서 테스트를 했었고, 기왕 하는김에 버전업도 오랜만해 해보기로 했다.
Hugo 0.125 다운로드
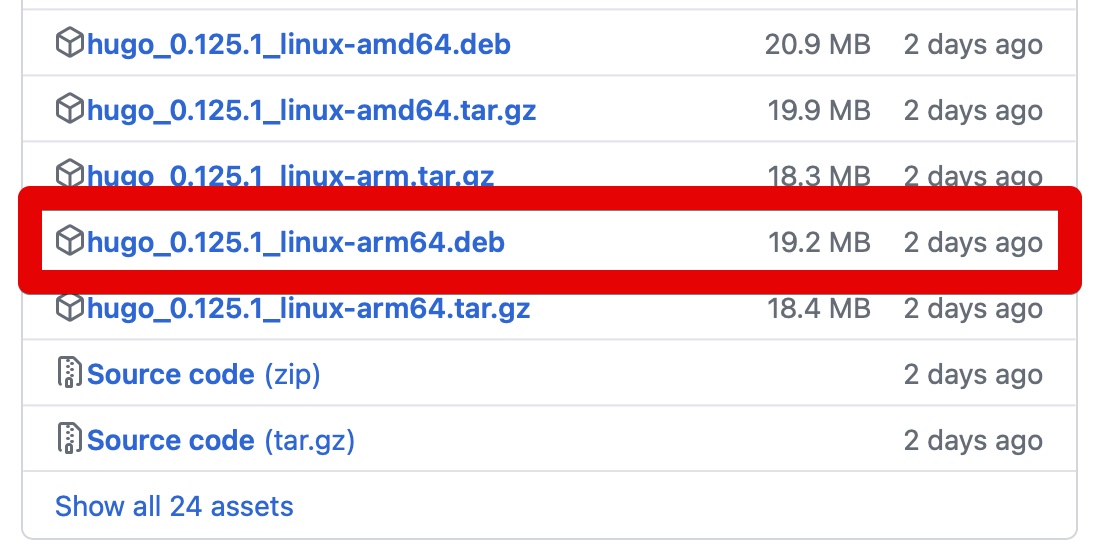
hugo github 사이트에서 hugo 설치파일을 받을 수 있다. 내가 사용하고자 하는 hugo 버전이 어떤 go 버전에서 빌드되었는지 아는게 중요하다. 나는 docker 를 이용하여 개발서버 환경을 만들 예정이라, docker golang 이미지를 다운받을 때 동일하거나 그 이상의 버전으로 설치할 예정이다.
# https://github.com/gohugoio/hugo/releases/tag/v0.125.0
v0.125.0
Some of the notable new features in this release:
This release is built with Go 1.22.2 (#12351) which comes with a fix for security issue CVE-2023-45288. We don't see how that could be exploited in Hugo, but we do appreciate that people want a clean security report.
난 docker 이미지는 데비안계열로 할 예정이고, m1 맥북에서 개발환경을 만들다보니, linux-arm64.deb 파일을 다운 받았다. 이 글을 보시는 분들은 본인 환경에 맞는 파일로 받아 설치를 진행하면 된다.
Docker 셋팅
혹시 로컬에 go 설치를 진행할 예정이라면 docker 셋팅은 필요없으니 넘어가면 된다. 나는 개발환경을 구성할 때, 바로 로컬pc 환경에서 설치하기 보다는 필요한 docker image 를 받아 가상환경으로 개발환경을 만들고 있다. 구성하려는 서버마다 필요한 패키지 버전과 설정값, os 환경 등이 다르기 때문에 macOS에 로컬로 구성하려다보면, 로컬 환경이 너무 너저분해지기 때문에 docker 로 구성하는 것을 선호한다. hugo 버전에 맞춰 golang:1.22-bookworm 이미지를 사용했고, 아까 받아뒀던 hugo_0.125.1_linux-arm64.deb 파일을 이미지에 넣어 설치까지 해놓아야 한다. Dockerfile 는 대략 아래처럼 만들어 docker build 처리했다.
FROM golang:1.22-bookworm

RUN apt-get update; \
		apt-get install -y apt-utils vim zsh curl git locales tzdata;

COPY packages /myfiles
RUN dpkg -i /myfiles/hugo_0.125.1_linux-arm64.deb
docker run 실행 스크립트이다. 로컬 볼륨만 잘 연결해줬다.
docker run -it --rm --name my-golang \
	-p 1313:1313 \
	-v ~/hugo/app:/go/src/hugo-app \
	-w /go/src/hugo-app/sourcebox-hugo-v0.125 golang-3 zsh
Hugo 사이트 만들기
새로 사이트를 만들려면, hugo new site [프로젝트명] 명령어를 실행하면 된다.
> hugo new site sourcebox-hugo-v0.125

Congratulations! Your new Hugo site was created in /go/src/hugo-app/sourcebox-hugo-v0.125.

Just a few more steps...

1. Change the current directory to /go/src/hugo-app/sourcebox-hugo-v0.125.
2. Create or install a theme:
   - Create a new theme with the command "hugo new theme <THEMENAME>"
   - Install a theme from https://themes.gohugo.io/
3. Edit hugo.toml, setting the "theme" property to the theme name.
4. Create new content with the command "hugo new content <SECTIONNAME>/<FILENAME>.<FORMAT>".
5. Start the embedded web server with the command "hugo server --buildDrafts".

See documentation at https://gohugo.io/.
만들어진 폴더를 들어가서 조회해본다.
> ls -al
total 4.0K
drwxr-xr-x 11 root root 352 Apr 21 00:22 ./
drwxr-xr-x  7 root root 224 Apr 21 00:11 ../
drwxr-xr-x  3 root root  96 Apr 21 00:11 archetypes/
drwxr-xr-x  2 root root  64 Apr 21 00:11 assets/
drwxr-xr-x  2 root root  64 Apr 21 00:11 content/
drwxr-xr-x  2 root root  64 Apr 21 00:11 data/
-rw-r--r--  1 root root  83 Apr 21 00:11 hugo.toml
drwxr-xr-x  2 root root  64 Apr 21 00:11 i18n/
drwxr-xr-x  2 root root  64 Apr 21 00:11 layouts/
drwxr-xr-x  2 root root  64 Apr 21 00:11 static/
drwxr-xr-x  3 root root  96 Apr 21 00:19 themes/
테마를 설치해야 한다. hugo는 테마가 너무 많아, 원하는 테마를 고르는 과정도 순탄치 않았다. 무료가 많긴하지만, 무료인 경우 받더라도 일부 부족한 디테일들이 있기 때문에, CSS, layout 파일들을 고쳐가며 써야 했다.
> git submodule add https://github.com/halogenica/beautifulhugo.git themes/beautifulhugo
Cloning into '~/hugo/app/sourcebox-hugo-v0.125/themes/beautifulhugo'...
remote: Enumerating objects: 3366, done.
remote: Counting objects: 100% (146/146), done.
remote: Compressing objects: 100% (64/64), done.
remote: Total 3366 (delta 80), reused 123 (delta 76), pack-reused 3220
Receiving objects: 100% (3366/3366), 6.78 MiB | 3.60 MiB/s, done.
Resolving deltas: 100% (1951/1951), done.
테마를 다운받고나서, hugo.toml 파일에서 테마를 정확히 설정해야 적용된다.
theme = "beautifulhugo"
canonifyURLs 은 설정안하기로 했다. 상대경로로 마크다운 문서에 작성하더라도 baseURL 까지 조립한 링크로 변환해주는데, 불필요해보여서 주석처리했다.
# 링크마다, baseURL 을 추가하여 조립하고 있음.
# canonifyURLs = true
content 폴더에 블로그를 작성하려고 했는데, 블로그 제목 밑에 글쓴시간이 제대로 나오지 않아 확인해보니, header.html 파일에 post_meta.html 파일과 연계가 되어야 하는데, 이 부분이 content/post 폴더명으로 해야 작동되도록 되어 있었다.
// /themes/beautifulhugo/layouts/partials/header.html
{{ if eq .Type "post" }}
    {{ partial "post_meta.html" . }}
{{ end }}
hugo.toml 파일에서 enableRobotsTXT 은 크롤링 권한을 부여하는 robots.txt 파일을 자동으로 만들어주는 옵션인데, true 로하면 tag, page 이런 것들도 포함이 되버려서 해당 옵션은 false 로 했다.
# hugo.toml 파일
enableRobotsTXT = false
직접 만든 robots.txt 파일이다.
User-agent: *
Disallow: /tags/
Disallow: /page/
Disallow: /en/tags/
Disallow: /en/page/
Sitemap: https://sourcebox.dev/sitemap.xml
그 외에도 몇가지 자잘한 셋팅들을 거쳐 업그레이드를 완료했다. 디자인이고 구성변경도 중요하지만, 기껏 바꿔서 검색엔진에 잘 나오던 포스팅들이 안나오면 곤란하니, 색인되었던 URL이 변경되지 않도록 하는게 중요할거 같다.
- layouts 폴더를 만들어서 기존 테마의 구성도 일부 수정
- main.css 수정(폰트, margin 등)
- 파비콘 이미지 업로드
- google adsense 셋팅
- sitemap.xml, sitemapindex.xml 파일 셋팅
- bootstrap icon 셋팅
- shortcodes 셋팅